209.1 Samba-Server-Konfiguration Gewichtung 5
209.1 Samba-Server-Konfiguration
Kandidaten sollten einen Samba-Server für verschiedene Clients einrichten können. Dieses Lernziel umfasst die Konfiguration von Samba als Standalone-Server sowie die Integration von Samba als Mitglied eines Active Directory. Ferner abgedeckt ist die Konfiguration eines einfachen CIFS und Druckerfreigaben. Auch die Konfiguration eines Linux-Clients zum Zugriff auf einen Samba-Server wird geprüft. Fehlersuche in Installationen wird ebenfalls geprüft.
Hauptwissensgebiete:
- Dokumentation von Samba 4
- Konfigurationsdateien von Samba 4
- Werkzeuge, Hilfsprogramme und Daemons von Samba 4
- Mounten von CIFS-Shares unter Linux
- Abbilden von Windows- auf Linux-Benutzernamen
- User-Level, Share-Level und AD-Sicherheit
Dies ist eine auszugsweise Liste der verwendeten Dateien, Begriffe und Hilfsprogramme:
- smbd, nmbd, winbindd
- smbcontrol, smbstatus, testparm, smbpasswd, nmblookup
- samba-tool
- net
- smbclient
- mount.cifs
- /etc/samba/
- /var/log/samba/
man-pages
- manpage von smbclient
- manpage von smbcontrol
- manpage von smbstatus
- manpage von testparm
- manpage von smbpasswd
- manpage von nmblookup
Installation
Ich installiere das nur auf Ubuntu.
- samba-common (Basiswerkzeuge von Samba wie smbpasswd )
- samba (der Samba Server)
sudo apt-get install samba-common samba
Konfiguration
Test-User anlegen
Nun lege ich mir erstmal einen User an:
# im System
useradd -m -s /bin/bash sambatest
passwd sambatest
  Enter new UNIX password:
  Retype new UNIX password:
  passwd: password updated successfully
# in Samba
smbpasswd -a sambatest
  New SMB password:
  Retype new SMB password:
  Added user sambatest.
weitere smbpasswd Kommandos sind:
sudo smbpasswd -x USERNAME # Entfernt den Benutzer USERNAME aus der Samba Datenbank
sudo smbpasswd -d USERNAME # Deaktiviert den Benutzer USERNAME in der Datenbank
sudo smbpasswd -e USERNAME # Aktiviert den vorher deaktivierten Benutzer USERNAME in der Datenbank wieder
Samba-Freigabe einrichten
Abgesehen vom anlegen des Verzeichnisses, geschiet das über die Datei /etc/samba/smb.conf.
mkdir -p /data/ablage1
in die Datei /etc/samba/smb.conf wurde folgender Abschnitt eingefügt:
[ablage1]
path = /data/ablage1
public = yes
writeable = yes
Aktivieren mit :
smbcontrol smbd reload-config
Portfreischaltungen
schauen wir uns mal unsere aktuellen Ports an, auf die unser System lauscht:
netstat -tulpn
Active Internet connections (only servers)
Proto Recv-Q Send-Q Local Address           Foreign Address         State       PID/Program name
tcp        0      0 127.0.0.53:53           0.0.0.0:*               LISTEN      625/systemd-resolve
tcp        0      0 0.0.0.0:22              0.0.0.0:*               LISTEN      785/sshd
tcp        0      0 0.0.0.0:445             0.0.0.0:*               LISTEN      2017/smbd
tcp        0      0 0.0.0.0:139             0.0.0.0:*               LISTEN      2017/smbd
tcp6       0      0 :::80                   :::*                    LISTEN      864/apache2
tcp6       0      0 :::22                   :::*                    LISTEN      785/sshd
tcp6       0      0 :::445                  :::*                    LISTEN      2017/smbd
tcp6       0      0 :::139                  :::*                    LISTEN      2017/smbd
udp        0      0 127.0.0.53:53           0.0.0.0:*                           625/systemd-resolve
udp        0      0 10.0.2.15:68            0.0.0.0:*                           587/systemd-network
udp        0      0 10.0.2.255:137          0.0.0.0:*                           2092/nmbd
udp        0      0 10.0.2.15:137           0.0.0.0:*                           2092/nmbd
udp        0      0 0.0.0.0:137             0.0.0.0:*                           2092/nmbd
udp        0      0 10.0.2.255:138          0.0.0.0:*                           2092/nmbd
udp        0      0 10.0.2.15:138           0.0.0.0:*                           2092/nmbd
udp        0      0 0.0.0.0:138             0.0.0.0:*                           2092/nmbd
smdb und nmdb kommen von unserer Samba-Installation. Folgendes Kommando filtert unsere benötigen Ports:
netstat -tulpn | grep mbd | grep tcp | awk  '{print $4}' |awk -F: '{print $NF}'\
 | sort | uniq | ruby -e 'puts ARGF.read.split(/\n/).join(",")'
139,445
netstat -tulpn | grep mbd | grep udp | awk  '{print $4}' |awk -F: '{print $NF}'\
 | sort | uniq | ruby -e 'puts ARGF.read.split(/\n/).join(",")'
137,138
Also werden eingehende Verbindungen über tcp auf Port 139 und 445 erwartet und über upd auf Port 137 und 138.
Weiterhin ist zu erkennen, dass smbd rein über das TCP-Protokoll geht und die Ports 139 und 445 verwendet. Und nmbd nur das
UDP-Protokoll verwendet über die Ports 137 und 138.
Share einbinden und verwenden, Rechte richtig setzen
Stattdessen habe ich meiner VM noch eine Hostonly-Adresse gegeben: 10.191.17.9. Damit ich das Share über meinen Windows-Host einbinden konnte:
C:\Users\gaida>net use z: \\10.191.17.9\ablage1 /U:10.191.17.9\sambatest
Das Kennwort oder der Benutzername ist ungültig für \\10.191.17.9\ablage1.

Geben Sie das Kennwort für "10.191.17.9\sambatest" ein, um eine Verbindung mit "10.191.17.9" herzustellen:
Der Befehl wurde erfolgreich ausgeführt.
auf dem Ubuntu sieht es nun wie folgt aus:
root@ubuntu:/data# ls -ld ablage1/
drwxrwxrwx 2 root root 4096 Nov 30 09:06 ablage1/
root@ubuntu:/data/ablage1# ls -l
total 8
-rwxr--r-- 1 sambatest sambatest 13 Nov 30 09:03 123.txt
-rw-rw-rw- 1 root      root      10 Nov 30 09:02 test.txt
Die Rechte sind nun noch nicht besonders gelungen. Der User sambatest kann hier zwar schreiben, aber auch alle anderen Systemuser. Schöner wäre es, eine Gruppe zu haben, über die auch die Rechte der System-User als auch der Samba-User sinnvoll gesetzt sind.
Zu diesem Zweck lege ich eine neue Gruppe ablage1 an, und mache den sambatest User zum Mitglied dieser Gruppe.
root@ubuntu:/data/ablage1# addgroup ablage1
Adding group 'ablage1' (GID 1003) ...
Done.
root@ubuntu:/data/ablage1# groups sambatest
sambatest : sambatest
root@ubuntu:/data/ablage1# usermod -G ablage1 sambatest
root@ubuntu:/data/ablage1# groups sambatest
sambatest : sambatest ablage1
Weiterhin lege ich nun einen weiteren Samba-User an, der die gleichen Rechte wie der erste bekommen soll:
root@ubuntu:/data# useradd -m -s /bin/bash sambatest2
root@ubuntu:/data# passwd sambatest2
Enter new UNIX password:
Retype new UNIX password:
passwd: password updated successfully
root@ubuntu:/data# smbpasswd -a sambatest2
New SMB password:
Retype new SMB password:
Added user sambatest2.
root@ubuntu:/data# usermod -G ablage1 sambatest2
root@ubuntu:/data# grep ablage1 /etc/group
ablage1:x:1003:sambatest,sambatest2
Nun ordne ich der neuen Gruppe das Verzeichnis zu und entferne die Rechte für alle User:
root@ubuntu:/data# chgrp ablage1 ablage1/
root@ubuntu:/data# chmod o-rwx ablage1/
root@ubuntu:/data# ls -dl ablage1/
drwxrwx--- 2 root ablage1 4096 Nov 30 09:06 ablage1/
zum Test nun noch ein weiterer Samba-User der nicht Mitglied dieser Gruppe wird:
root@ubuntu:~# useradd -m -s /bin/bash sambatest3
root@ubuntu:~# passwd sambatest3
Enter new UNIX password:
Retype new UNIX password:
passwd: password updated successfully
root@ubuntu:~# smbpasswd -a sambatest3
New SMB password:
Retype new SMB password:
Added user sambatest3.
root@ubuntu:~# su - sambatest3
sambatest3@ubuntu:~$ ls -l /data/ablage1/
ls: cannot open directory '/data/ablage1/': Permission denied
Wie wir sehen komm der System-User sambatest3 nicht an die Dateien. Hingegen kann der System-User sambatest2
gut damit arbeiten:
root@ubuntu:~# su - sambatest2
sambatest2@ubuntu:~$ ls -l /data/ablage1/
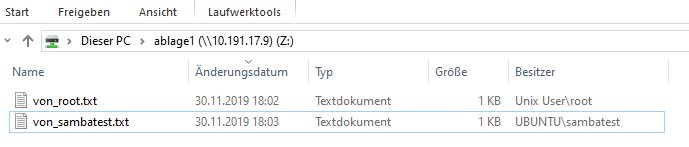
total 8
-rw-rw-rw- 1 root root 10 Nov 30 09:02 von_root.txt
-rwxr--r-- 1 sambatest sambatest 13 Nov 30 09:03 von_sambatest.txt
sambatest2@ubuntu:~$ echo 123 > von_sambatest2.txt
sambatest2@ubuntu:~$ ls -l
total 4
-rw-rw-r-- 1 sambatest2 sambatest2 4 Nov 30 09:33 von_sambatest2.txt
sambatest2@ubuntu:~$ chgrp ablage1 von_sambatest2.txt
sambatest2@ubuntu:~$ ls -l
total 4
-rw-rw-r-- 1 sambatest2 ablage1 4 Nov 30 09:33 von_sambatest2.txt
Was aber wenn sambatest2 die eine Datei von einem Windows-Rechner aus anlegt. Dann kann er nicht die Gruppe ändern und der User sambatest kann in die Datei nicht schreiben.
Frage: Wie setze ich die default-Group für neue Dateien in einem samba-share?
Lösung: Das geht über die force group Direktive, die man in der smb.conf im Freigabe-Abschnitt setzt.Das ganze ist in der man-page von smb.conf erläutert.
Also:
[ablage1]
path = /data/ablage1
public = yes
writeable = yes
force group = ablage1
Diese Änderung wird sofort nach dem Kommando smbcontrol smbd reload-config aktiv.
net Kommandos
root@ubuntu:/data/ablage1# net status shares

Service      pid     machine       Connected at
-------------------------------------------------------
ablage1      1417   10.191.17.1   Sat Nov 30 08:56:57 2019
Kommando smbstatus
Berichtet über den aktuellen Sambastatus:
root@ubuntu:~# smbstatus

Samba version 4.7.6-Ubuntu
PID     Username     Group        Machine                                   Protocol Version  Encryption           Signing
----------------------------------------------------------------------------------------------------------------------------------------

Service      pid     Machine       Connected at                     Encryption   Signing
---------------------------------------------------------------------------------------------

No locked files
Da ist nicht viel los. Dann verbinde ich mich mal auf mein Share:
C:\Users\gaida>net use z: \\10.191.17.9\ablage1 /U:10.191.17.9\sambatest
Geben Sie das Kennwort für "10.191.17.9\sambatest" ein, um eine Verbindung mit "10.191.17.9" herzustellen:
Der Befehl wurde erfolgreich ausgeführt.
Und jetzt?
root@ubuntu:~# smbstatus

Samba version 4.7.6-Ubuntu
PID     Username     Group        Machine                                   Protocol Version  Encryption           Signing
----------------------------------------------------------------------------------------------------------------------------------------
2679    sambatest    sambatest    10.191.17.1 (ipv4:10.191.17.1:52955)      SMB3_11           -                    partial(AES-128-CMAC)

Service      pid     Machine       Connected at                     Encryption   Signing
---------------------------------------------------------------------------------------------
ablage1      2679    10.191.17.1   Sa Jan 11 10:24:38 2020 CET      -            -
IPC$         2679    10.191.17.1   Sa Jan 11 10:24:38 2020 CET      -            -

Locked files:
Pid          Uid        DenyMode   Access      R/W        Oplock           SharePath   Name   Time
--------------------------------------------------------------------------------------------------
2679         1002       DENY_NONE  0x80        RDONLY     NONE             /data/ablage1   .   Sat Jan 11 10:24:38 2020
Kommando smbmount
weiß nicht genau, ob das noch relevant istm, aber laut http://lpic2.unix.nl/ch10.html schon.
Da ich zu diesem Thema auf den aktuellen Distributionen nicht mehr viel machen kann, da kein smbmount mehr verfügbar ist. Kopiere ich den Inhalt von http://lpic2.unix.nl/ch10.html :
smbmount
NOTE: Even though smbmount has been abandoned by most major Linux distributions in favor of mount.cifs you can still expect questions about smbmount during your LPIC2 exam.

Even as smbmount was maintained by the Samba community is was not a part of the core samba-client packages. The “smbfs” package contains the smbmount command and must be installed to be able to use smbmount.

smbmount is used to mount file systems shared over SMB. Most probably these file systems are found on Windows systems and shared with Linux systems with SMB client software installed. smbmount is the command line utility for mounting SMB file systems. For a more permanent implementation the smbfs is available for use in /etc/fstab.

Both methods to mount SMB file systems accept options to determine how the file system is mounted. The most common options are listed here:

username
Define username for authentication of the SMB session.

password
Define password for authentication of the SMB session.

credentials
This option points to a file containing a username and password. Use of this option is prefered over using the username and password in the command line options or in /etc/fstab. This file must have proper protection so only the user and/or root can read it.

	username=value
	password=value

uid
Define UID used for the local representation of the files on the mounted file system.

gid
Define GID used for the local representation of the files on the mounted file system.

fmask
Define permissions of remote files in the local representation of the mounted file system. This doesn't affect the actual permissions on the remote server.

Important: The name of the option is deceptive. It's not a mask but the actual permissions that is defined.

dmask
Define permissions of remote directories in the local representation of the mounted file system. This doesn't affect the actual permissions on the remote server.

Important: The name of the option is deceptive. It's not a mask but the actual permissions that is defined.

rw/ro
Mount the filesystem read-write or read-only.

Example command line usage:

	smbmount //windows/winshare2 /opt/winshare2 -o \
		username=alice.jones,password=Alice,uid=nobody,gid=nobody,fmask=775,dmask=775,rw,hard

Example of /etc/fstab usage:

	//windows/winshare2 /opt/winshare2 smbfs \
		username=alice.jones,password=Alice,uid=nobody,gid=nobody,fmask=775,dmask=775,rw,hard ://windows/winshare2 0 0
User Auflisten
Hier habe ich das Kommando pdbedit -L -v gefunden (auf https://superuser.com/questions/271034/list-samba-users)
---------------
Unix username:        sambatest
NT username:
Account Flags:        [U          ]
User SID:             S-1-5-21-3999205194-799000537-2371331654-1000
Primary Group SID:    S-1-5-21-3999205194-799000537-2371331654-513
Full Name:
Home Directory:       \\ubuntu\sambatest
HomeDir Drive:
Logon Script:
Profile Path:         \\ubuntu\sambatest\profile
Domain:               UBUNTU
Account desc:
Workstations:
Munged dial:
Logon time:           0
Logoff time:          Mi, 06 Feb 2036 16:06:39 CET
Kickoff time:         Mi, 06 Feb 2036 16:06:39 CET
Password last set:    Sa, 30 Nov 2019 12:40:55 CET
Password can change:  Sa, 30 Nov 2019 12:40:55 CET
Password must change: never
Last bad password   : 0
Bad password count  : 0
Logon hours         : FFFFFFFFFFFFFFFFFFFFFFFFFFFFFFFFFFFFFFFFFF
---------------
Unix username:        sambatest3
NT username:
Account Flags:        [U          ]
User SID:             S-1-5-21-3999205194-799000537-2371331654-1002
Primary Group SID:    S-1-5-21-3999205194-799000537-2371331654-513
Full Name:
Home Directory:       \\ubuntu\sambatest3
HomeDir Drive:
Logon Script:
Profile Path:         \\ubuntu\sambatest3\profile
Domain:               UBUNTU
Account desc:
Workstations:
Munged dial:
Logon time:           0
Logoff time:          Mi, 06 Feb 2036 16:06:39 CET
Kickoff time:         Mi, 06 Feb 2036 16:06:39 CET
Password last set:    Sa, 30 Nov 2019 18:31:44 CET
Password can change:  Sa, 30 Nov 2019 18:31:44 CET
Password must change: never
Last bad password   : 0
Bad password count  : 0
Logon hours         : FFFFFFFFFFFFFFFFFFFFFFFFFFFFFFFFFFFFFFFFFF
---------------
Unix username:        sambatest2
mounten mit cifs
das mache ich mal von dem centos aus. Dazu die cifs Paket installieren und ein Verzeichnis zum mounten anlegen:
[root@centos ~]# yum install cifs-utils
mkdir /root/ablage1
Nun mounten:
[root@centos ~]# mount -t cifs -o user=sambatest2,domain=10.191.17.9 //10.191.17.9/ablage1 /root/ablage1
Password for sambatest2@//10.191.17.9/ablage1:  ********************************************************
[root@centos ~]# ls -l /root/ablage1/
total 11264
-rwxr-xr-x. 1 root root 4276224 Nov 30 19:40 core
-rwxr-xr-x. 1 root root       0 Nov 30 19:40 Neues Textdokument.txt
-rwxr-xr-x. 1 root root       8 Nov 30 17:39 noch eine von sambatest.txt
-rwxr-xr-x. 1 root root       3 Nov 30 19:41 test55
-rwxr-xr-x. 1 root root       4 Nov 30 17:41 von_nur_lesen_fuer_andere_sambatest2.txt
-rwxr-xr-x. 1 root root      13 Nov 30 17:39 von_root.txt
-rwxr-xr-x. 1 root root      11 Nov 30 17:41 von_sambatest2.txt
-rwxr-xr-x. 1 root root      21 Nov 30 17:39 von_sambatest.txt
Wie sieht es jetzt mit dem smbstatus aus?
root@ubuntu:~# smbstatus

Samba version 4.7.6-Ubuntu
PID     Username     Group        Machine                                   Protocol Version  Encryption           Signing
----------------------------------------------------------------------------------------------------------------------------------------
2679    sambatest    sambatest    10.191.17.1 (ipv4:10.191.17.1:52955)      SMB3_11           -                    partial(AES-128-CMAC)
3722    sambatest    sambatest    10.191.17.1 (ipv4:10.191.17.1:54275)      SMB3_11           -                    partial(AES-128-CMAC)
3724    sambatest2   sambatest2   10.191.17.6 (ipv4:10.191.17.6:41340)      SMB3_02           -                    partial(AES-128-CMAC)

Service      pid     Machine       Connected at                     Encryption   Signing
---------------------------------------------------------------------------------------------
ablage1      3722    10.191.17.1   Sa Jan 11 11:07:10 2020 CET      -            -
ablage1      2679    10.191.17.1   Sa Jan 11 10:24:38 2020 CET      -            -
IPC$         3724    10.191.17.6   Sa Jan 11 11:09:10 2020 CET      -            -
ablage1      3724    10.191.17.6   Sa Jan 11 11:09:10 2020 CET      -            -

Locked files:
Pid          Uid        DenyMode   Access      R/W        Oplock           SharePath   Name   Time
--------------------------------------------------------------------------------------------------
2679         1002       DENY_NONE  0x80        RDONLY     NONE             /data/ablage1   .   Sat Jan 11 10:24:38 2020
3722         1002       DENY_NONE  0x80        RDONLY     NONE             /data/ablage1   .   Sat Jan 11 11:07:10 2020
Kommando testparm
Das Kommando überprüft die Syntax der smb.conf
Wichtig Optionen:
-sPrint service definitions without prompting for a carriage return-vList all options; by default only the ones specified in smb.conf are listed
root@ubuntu:~# testparm
Load smb config files from /etc/samba/smb.conf
rlimit_max: increasing rlimit_max (1024) to minimum Windows limit (16384)
WARNING: The "syslog" option is deprecated
Processing section "[printers]"
Processing section "[print$]"
Processing section "[ablage1]"
Loaded services file OK.
Server role: ROLE_STANDALONE

Press enter to see a dump of your service definitions

# Global parameters
[global]
        dns proxy = No
        log file = /var/log/samba/log.%m
        map to guest = Bad User
        max log size = 1000
        obey pam restrictions = Yes
        pam password change = Yes
        panic action = /usr/share/samba/panic-action %d
        passwd chat = *Enter\snew\s*\spassword:* %n\n *Retype\snew\s*\spassword:* %n\n *password\supdated\ssuccessfully* .
        passwd program = /usr/bin/passwd %u
        server role = standalone server
        server string = %h server (Samba, Ubuntu)
        syslog = 0
        unix password sync = Yes
        usershare allow guests = Yes
        idmap config * : backend = tdb
        inherit acls = Yes
        store dos attributes = Yes
        vfs objects = acl_xattr


[printers]
        browseable = No
        comment = All Printers
        create mask = 0700
        path = /var/spool/samba
        printable = Yes


[print$]
        comment = Printer Drivers
        path = /var/lib/samba/printers


[ablage1]
        force group = ablage1
        guest ok = Yes
        path = /data/ablage1
        read only = No
Nun baue ich mal absichtlich einen Fehler in die Konfiguration ein:
[printers]
   comment = All Printers
   browseable = nö
   path = /var/spool/samba
Wenn ich den test nun mit -s (Eingabe wird unterdrückt) aufrufe kommt nun folgender Fehler und der Returncode von testparm ist größer 0:
root@ubuntu:~# vi /etc/samba/smb.conf
root@ubuntu:~# testparm -s
Load smb config files from /etc/samba/smb.conf
rlimit_max: increasing rlimit_max (1024) to minimum Windows limit (16384)
WARNING: The "syslog" option is deprecated
Processing section "[printers]"
set_variable_helper(nö): value is not boolean!
Error loading services.
root@ubuntu:~# echo $?
1
Das ist dann doch sehr hilfreich, da man direkt über der Zeile mit dem Wort Error die Fehlerbeschreibung lesen kann.
Ich baue den Fehler aus und rufe diese Testprogramm nun so auf, dass es mir sofort anzeigt, ob die Einstellungen brauchbar sind:
root@ubuntu:~# testparm -s > /dev/null && echo samba config ok
Load smb config files from /etc/samba/smb.conf
rlimit_max: increasing rlimit_max (1024) to minimum Windows limit (16384)
WARNING: The "syslog" option is deprecated
Processing section "[printers]"
Processing section "[print$]"
Processing section "[ablage1]"
Loaded services file OK.
Server role: ROLE_STANDALONE

samba config ok
Kommando smbpasswd
Verwendung
Zum ändern des SMB-Kennwortes eines Benutzers. Standardmäßig (bei Ausführung ohne Argumente) versucht smbpasswd, das SMB-Kennwort des aktuellen Benutzers auf dem lokalen Computer zu ändern. Dies ähnelt der Funktionsweise des Programms passwd (1). Wenn es von root ausgeführt wird, kann es verwendet werden, um Benutzerkonten im konfigurierten Passwort-Backend zu verwalten. Beachten Sie, dass dieses Dienstprogramm zwar smbpasswd heißt, die Änderungen jedoch nicht unbedingt in die smbpasswd-Datei schreibt. smbpasswd funktioniert auf dem in smb.conf konfigurierten passdb-Backend.
Ich verwende aktuell tdbsam:
root@ubuntu:/etc/samba# grep passdb /etc/samba/smb.conf
   passdb backend = tdbsam
die wichtigsten Parameter und Syntax
Syntax:
# als root:
smbpasswd [options] [username]

# als ordinary user:
smbpasswd [options]
wichtige Parameter:
-aneuen User der User-DB hinzufügen-xUser aus der User-DB entfernen
Accountdatenbanken
Es gibt 3:
- smbpasswd
- tdbsam
- ldapsam
Empfohlen wird ldapsam, Erläuterungen dazu unter (http://lpic2.unix.nl/ch10.html#passdb_backend)[http://lpic2.unix.nl/ch10.html#passdb_backend].
Kommando nmblookup
Wird verwendet, um NetBIOS-Namen abzufragen und sie mit NetBIOS über TCP / IP-Abfragen IP-Adressen in einem Netzwerk zuzuordnen. Mit den Optionen dieses Befehls können die Namensabfragen an einen bestimmten IP-Broadcast-Bereich oder an einen bestimmten Computer gerichtet werden. Alle Abfragen erfolgen über UDP.
Nützliche Parameter sind:
-Msucht den master browser-RRekursion. Wenn Sie mit nmblookup einen WIINS-Server mit der UNICAST-Befehlszeilenoption direkt abfragen, ist eine Rekursion erforderlich, damit der WINS-Server auf Abfragen reagiert, die sich nicht auf seinen eigenen NetBIOS-Namen oder seine IP-Adresse beziehen. Ohne eingestellte Rekursion antwortet der WINS-Server nur mit seinem eigenen NetBIOS-Namen.-U <unicast address>Sendet die Abfrage an die angegebene UNICAST-Adresse (eines WINS-Servers). Beispiel:nmblookup -R -U 10.10.10.2 clientname
Kommando smbclient
Installation auf centos7: yum install samba-client, wie kommt man darauf: yum whatprovides smbclient.
Das ist ein Client, der eine Verbindung zu einem SMB / CIFS-Server herstellen kann. Es bietet eine ähnliche Oberfläche wie das FTP-Programm (siehe ftp (1)). Zu den Vorgängen gehören Aktionen wie das Abrufen von Dateien vom Server auf den lokalen Computer, das Abrufen von Dateien vom lokalen Computer auf den Server, das Abrufen von Verzeichnisinformationen vom Server usw.
Useful command line options:
-
-L <netbios name/IP>Auflisten der auf dem Server verfügbaren Dienste, die auf den angegebenen NetBIOS-Namen reagieren. -
-N|--no-passhierdurch wird die Passwortabfrage unterdrückt. -
-I <IP address>Stellt eine direkte Verbindung mit der angegebenen IP-Adresse her, anstatt das Netzwerk nach der IP-Adresse des angegebenen NetBIOS-Namens zu fragen. -
-c <command>Führt den angegebenen SMB-Befehl auf dem Server aus. Eine Implementierung ist das Drucken mit smbclient.
-U Connect as the given user.
Beispiele:
Auflisten der auf dem Server verfügbaren Dienste:
[root@centos ~]# smbclient -L 10.191.17.9 -U smbtest
Enter SAMBA\smbtest's password:

        Sharename       Type      Comment
        ---------       ----      -------
        print$          Disk      Printer Drivers
        ablage1         Disk
        IPC$            IPC       IPC Service (ubuntu server (Samba, Ubuntu))
Reconnecting with SMB1 for workgroup listing.

        Server               Comment
        ---------            -------

        Workgroup            Master
        ---------            -------
        WORKGROUP            UBUNTU
[root@centos ~]# smbclient '\\10.191.17.9\ablage1' -U smbtest
Enter SAMBA\smbtest's password:
Try "help" to get a list of possible commands.
smb: \> help
?              allinfo        altname        archive        backup
blocksize      cancel         case_sensitive cd             chmod
chown          close          del            deltree        dir
du             echo           exit           get            getfacl
geteas         hardlink       help           history        iosize
lcd            link           lock           lowercase      ls
l              mask           md             mget           mkdir
more           mput           newer          notify         open
posix          posix_encrypt  posix_open     posix_mkdir    posix_rmdir
posix_unlink   posix_whoami   print          prompt         put
pwd            q              queue          quit           readlink
rd             recurse        reget          rename         reput
rm             rmdir          showacls       setea          setmode
scopy          stat           symlink        tar            tarmode
timeout        translate      unlock         volume         vuid
wdel           logon          listconnect    showconnect    tcon
tdis           tid            utimes         logoff         ..
!
smb: \> ls
  .                                   D        0  Sat Nov 30 19:41:27 2019
  ..                                  D        0  Sat Nov 30 11:52:43 2019
  von_sambatest2.txt                  N       11  Sat Nov 30 17:41:15 2019
  core                                N  4276224  Sat Nov 30 19:40:31 2019
  von_nur_lesen_fuer_andere_sambatest2.txt      N        4  Sat Nov 30 17:41:42 2019
  von_root.txt                        N       13  Sat Nov 30 17:39:24 2019
  noch eine von sambatest.txt         N        8  Sat Nov 30 17:39:51 2019
  test55                              N        3  Sat Nov 30 19:41:27 2019
  Neues Textdokument.txt              N        0  Sat Nov 30 19:40:53 2019
  von_sambatest.txt                   N       21  Sat Nov 30 17:39:30 2019

                30435260 blocks of size 1024. 24966056 blocks available
smb: \> exit
[root@centos ~]#
Achtung: Sie müssen die Unterstützung für smbfs in Ihrem Kernel kompiliert haben, um diese Dienstprogramme verwenden zu können!
Mit Hilfe des smbclients ist es auch möglich zu drucken.
Kommando samba-tool
Samba-Tool ist das Hauptverwaltungstool von Samba4. Es kann zum Konfigurieren und Verwalten aller Aspekte des Samba-Servers verwendet werden, wenn dieser als Active Directory-Domänencontroller (AD DC) konfiguriert ist. Obwohl in den Manpages derzeit anders angegeben, wird die Verwendung des Samba-Tools zum Konfigurieren des Servers als Domänenmitglied oder eigenständiger Server nicht unterstützt. Diese Optionen werden in einer zukünftigen Version von Samba-Tool entfernt. Beachten Sie, dass dieses Tool nicht auf allen Systemen verfügbar ist, wenn es mit den Paketen installiert wird. Beispielsweise ist es unter RHEL7 und CentOS 7 nur verfügbar, wenn Samba4 von der Quelle aus installiert wird.
hier eine Parameterauswahl:
| Parameter | Funktion |
|---|---|
| dbcheck | So überprüfen Sie die lokale AD-Datenbank auf Fehler. |
| delegation | Delegationen verwalten. |
| dns | So verwalten Sie die DNS-Einträge. |
| domain | Zum Verwalten von Domänenoptionen, z. B. zum Erstellen eines AD DC. |
| drs | So verwalten Sie Directory Replication Services (DRS). |
| dsacl | So verwalten Sie DS-ACLs |
| fsmo | Für die Verwaltung flexibler Single Master-Vorgänge (FSMO). |
| gpo | So verwalten Sie Gruppenrichtlinienobjekte (Group Policy Objects, GPO) |
| group | Gruppen verwalten oder erstellen. |
| ldapcmp | So vergleichen Sie zwei LDAP-Datenbanken |
| ntacl | So verwalten Sie NT-ACLs |
| rodc | So verwalten Sie schreibgeschützte Domänencontroller (RODC) |
| sites | Websites verwalten. |
| spn | So verwalten Sie Dienstprinzipalnamen (Service Principal Names, SPN). |
| testparm | So überprüfen Sie die Konfigurationsdateien. |
| time | So rufen Sie die Uhrzeit auf einem Server ab. |
| user | So verwalten oder erstellen Sie Benutzer. |